Distorting lines running across your television—whether solid single-pixel lines, thick colored bands, or flickering multi-colored stripes—are a common display issue in modern LED, QLED, and OLED televisions.
When encountering lines on a screen, homeowners often wonder if the problem stems from a simple software glitch, a loose internal ribbon cable, a failing Timing Control (T-Con) board, or unrepairable LCD panel damage. This diagnostic guide will walk you through systematic troubleshooting steps to isolate the fault.
1. Quick Initial Diagnosis & Basic Resets
Before attempting to open your TV, rule out external source issues, bad HDMI cables, or temporary video processing glitches.
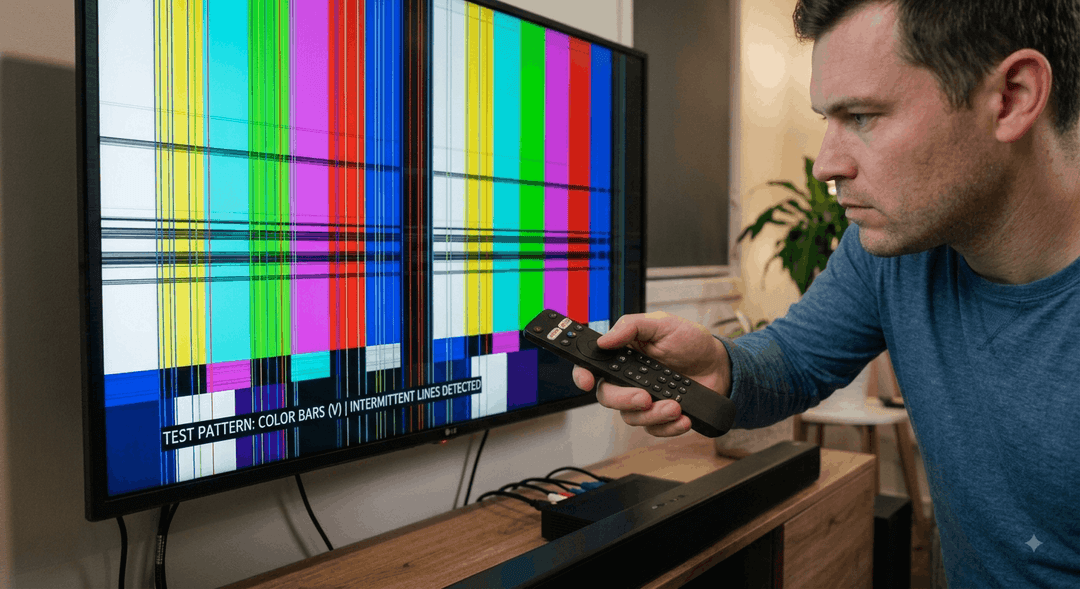
Figure 1: Testing if the line distortion overlaps the TV's native On-Screen Display (OSD) menu to isolate external sources from internal hardware.
Step 1: On-Screen Display (OSD) Menu Test
- Press the Menu or Settings button on your TV remote to bring up the TV's internal setup overlay.
- Observe if the lines appear over or under the menu interface:
- Lines appear behind the menu text/box: The issue is likely originating from an external source (cable box, gaming console, or faulty HDMI cable).
- Lines run straight through the menu text: The fault is hardware-based, originating in the TV's internal T-Con board, ribbon cables, or LCD panel.
Step 2: Perform a Deep Power Cycle
- Unplug the TV power cable directly from the wall outlet.
- Disconnect all HDMI, AV, and audio cables connected to the TV.
- Hold down the physical Power Button on the TV panel for 30 to 60 seconds to fully discharge internal capacitors.
- Leave the TV unplugged for 10–15 minutes.
- Plug the power cable directly into the wall (bypassing surge protectors or AV receivers) and power on.
2. Horizontal vs. Vertical Lines: Understanding the Root Cause
The direction and behavior of the lines provide crucial clues regarding which internal component has failed.
| line type or behavior | common root cause | repair feasibility |
|---|---|---|
| Single/Multiple Vertical Lines | Loose LVDS/FFC cable or T-Con board line driver fault | High: Re-seat cables or replace T-Con board |
| Flickering Vertical Lines (Pressure Sensitive) | TV TAB bonding flex cable issue (COF IC delamination) | Moderate: TAB tape pressure fix or professional bonding |
| Solid Dark Horizontal Lines | Damaged LCD gate driver or panel row short circuit | Low: Panel replacement usually required |
| Intermittent Horizontal Bands | Faulty T-Con board voltage rail or loose ribbon connector | High: Clean contacts and replace T-Con board |
3. T-Con Board Troubleshooting & Cable Re-seating
If basic resets do not remove the lines, the next step in T-Con board troubleshooting involves inspecting, cleaning, and re-seating the flexible flat cables (FFC) connecting the mainboard, T-Con board, and panel driver boards.

Figure 2: Inspecting and cleaning gold contacts on Flat Flexible Cables (FFC) attached to the T-Con board.
Step-by-Step Cable Cleaning and Re-seating:
- Safety First: Disconnect power and place the TV face-down on a soft, clean surface (such as a microfiber blanket).
- Remove the Back Cover: Remove the perimeter screws and lift off the rear chassis panel.
- Locate the T-Con Board: The T-Con board is typically situated at the bottom center or middle of the panel, covered by a metallic shield.
- Inspect & Clean FFC Connectors:
- Carefully flip open the locking latches on the ribbon connectors.
- Gently pull out the flat ribbon cables.
- Use a cotton swab dampened with 99% Isopropyl Alcohol (IPA) to clean oxidation from the gold contact pins.
- Allow to dry completely, then firmly re-insert the ribbon cables squarely into the sockets and lock the latches.
4. Addressing a TV TAB Bonding Flex Cable Issue
When vertical lines flicker, change color, or temporarily disappear when pressure is applied to the top or bottom bezel of the TV frame, the root cause is a TV TAB bonding flex cable issue (Tape Automatic Bonding / Chip-on-Film).
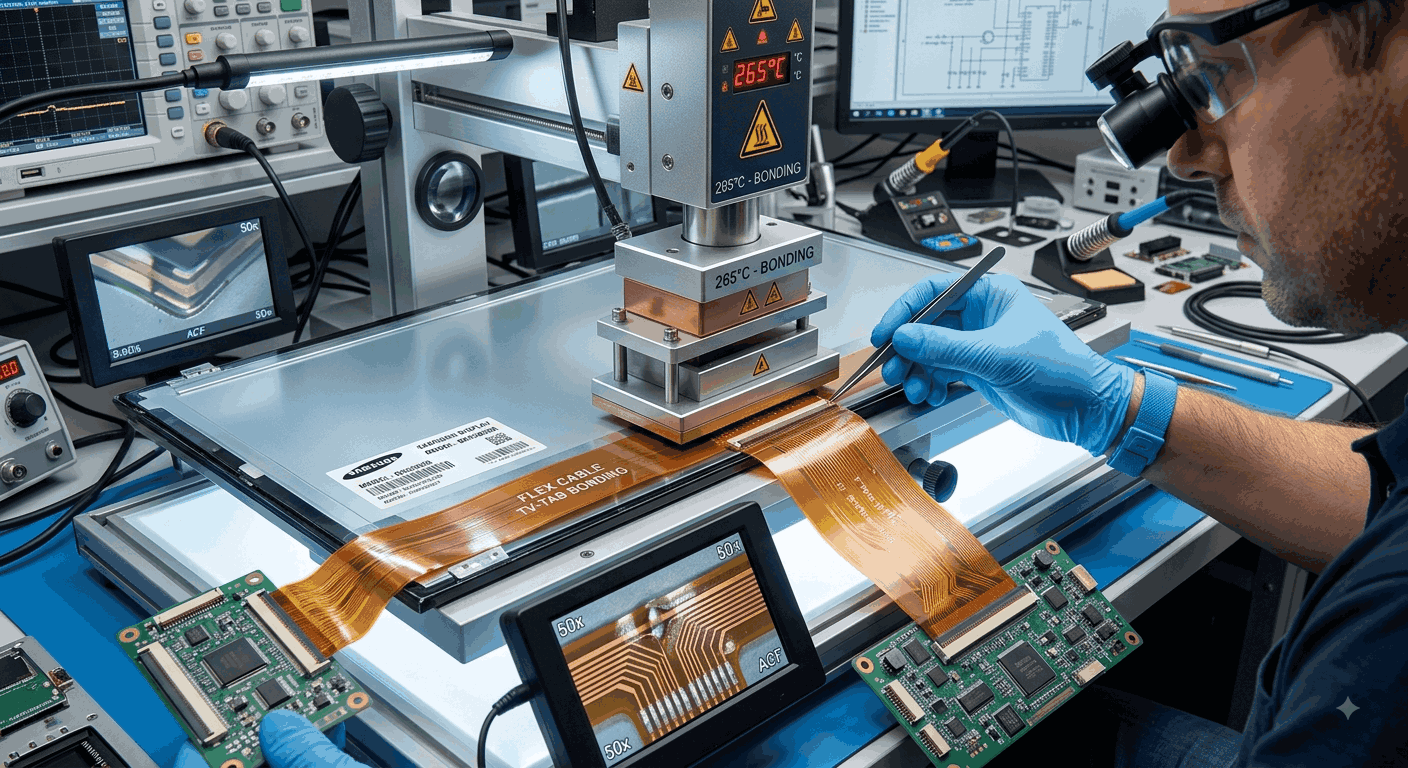
Figure 3: Microscopic look at Chip-on-Film (COF) flex connections running along the edge of the glass LCD panel.
Understanding TAB Bonding Failures:
- The TAB flex cables connect the printed circuit boards (address boards) directly to the glass LCD matrix using Anisotropic Conductive Film (ACF).
- Heat, moisture, or frame flexing can cause tiny conductive traces in the tape to detach from the glass edge, producing persistent vertical lines (vertical lines on TV screen fix).
- Temporary DIY Mitigation: In some instances, applying high-density silicone foam pads along the bezel frame directly over the affected TAB flex tape restores mechanical contact.
- Permanent Repair: Requires a specialized professional ACF bonding machine to apply heat and pressure to re-weld the flex cable to the LCD glass.
5. Diagnostic Decision Tree
Use this systematic flow chart to assess whether your TV line issue requires a simple component swap or professional assessment:
              [Lines Appearing on TV Screen]
                            │
                            ▼
               Check OSD / Settings Menu
                            │
                 ┌──────────┴──────────┐
                 ▼                     ▼
         [Lines Behind Menu]   [Lines Over Menu]
                 │                     │
                 ▼                     ▼
         Check HDMI Cable /    Perform Deep Power Cycle
         External Media Box            │
                              ┌────────┴────────┐
                              ▼                 ▼
                         [Lines Gone]     [Lines Remain]
                              │                 │
                              ▼                 ▼
                           (Fixed)    Open Back Panel & Inspect
                                      T-Con & FFC Connectors
                                                │
                                       ┌────────┴────────┐
                                       ▼                 ▼
                                [Clean/Re-seat FFC]   [Press Bezel Edge]
                                       │                 │
                                       ▼                 ▼
                                Line Cleared?    Lines Shift/Disappear?
                                  /        \             │
                                Yes         No           ▼
                                /            \    TAB Bonding Issue
                          (Complete)     Replace  (Requires Foam Pad
                                        T-Con Board  or ACF Bonding)
6. Summary
Fixing lines on a television screen ranges from straightforward software/cable maintenance to advanced component replacement:
- Horizontal lines LCD screen repair often highlights gate driver or panel-level damage, which may necessitate an assessment for replacement.
- Vertical lines on TV screen fix can frequently be resolved at home by re-seating ribbon cables, performing T-Con board troubleshooting, or addressing minor connection contacts.
Experiencing a similar issue? Contact us for a no-obligation quote. We're here to help.
If you know what parts to look for, please visit Tech and Bids to search for what you need.